Field Templates for Jira - User Guide
Field Templates for Jira
Field Templates is a tool made to simplify typical issue creation process by pasting one-click templates into Jira text fields. As well as making standard comments in issues. Templates can be created in the project administrator panel by project administrators or anyone can create personal templates for themselves (see below). Project templates can be of 2 types available: for issue Text fields and issue Comments.
To select what kind of template you want to create go to Project administration section → Select Field Templates menu.
On the provided page you can see two tabs representing types of templates:
- Issue Fields
- Comments
Issue Field tab has menu of templates for text fields while switching to Comments tab you can find the menu to create templates for comments.
Issue Field Templates
Create template
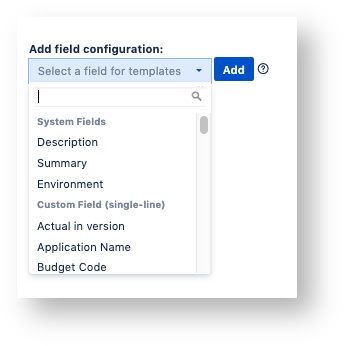
- From the drop down list, select a field (ex. Description).
Only for Issue field templates. Skip this step and switch to "Comments" tab to create a comment template.
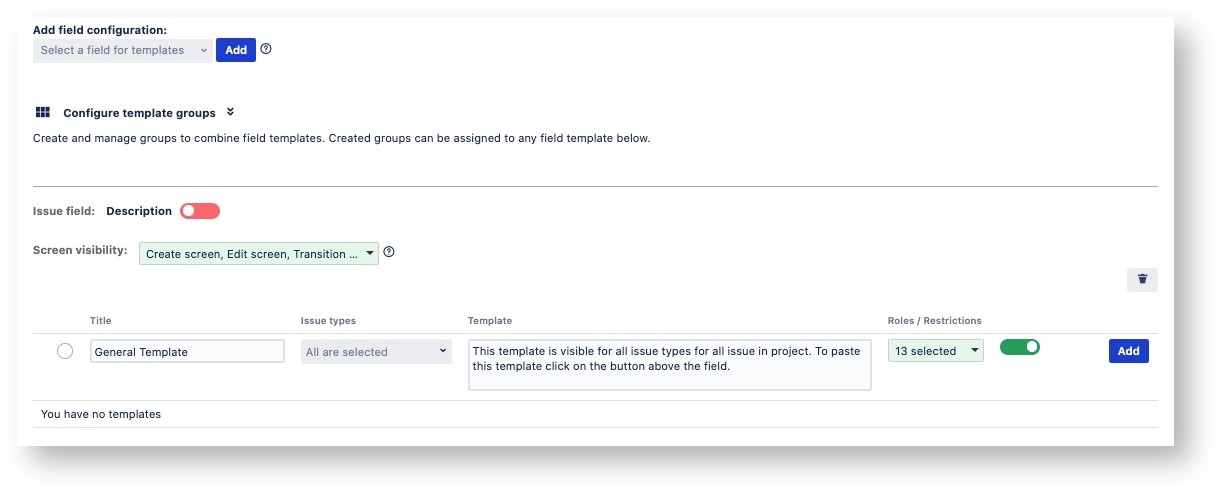
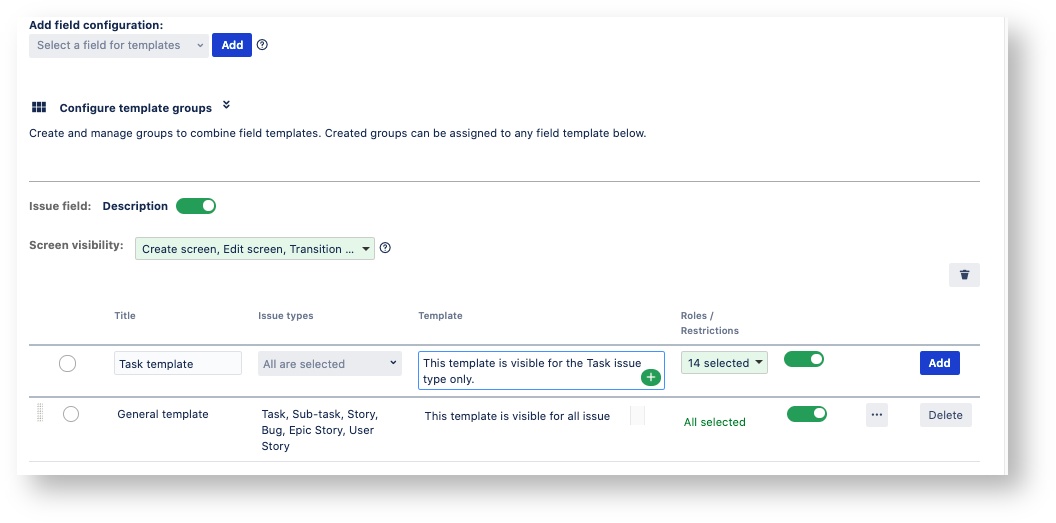
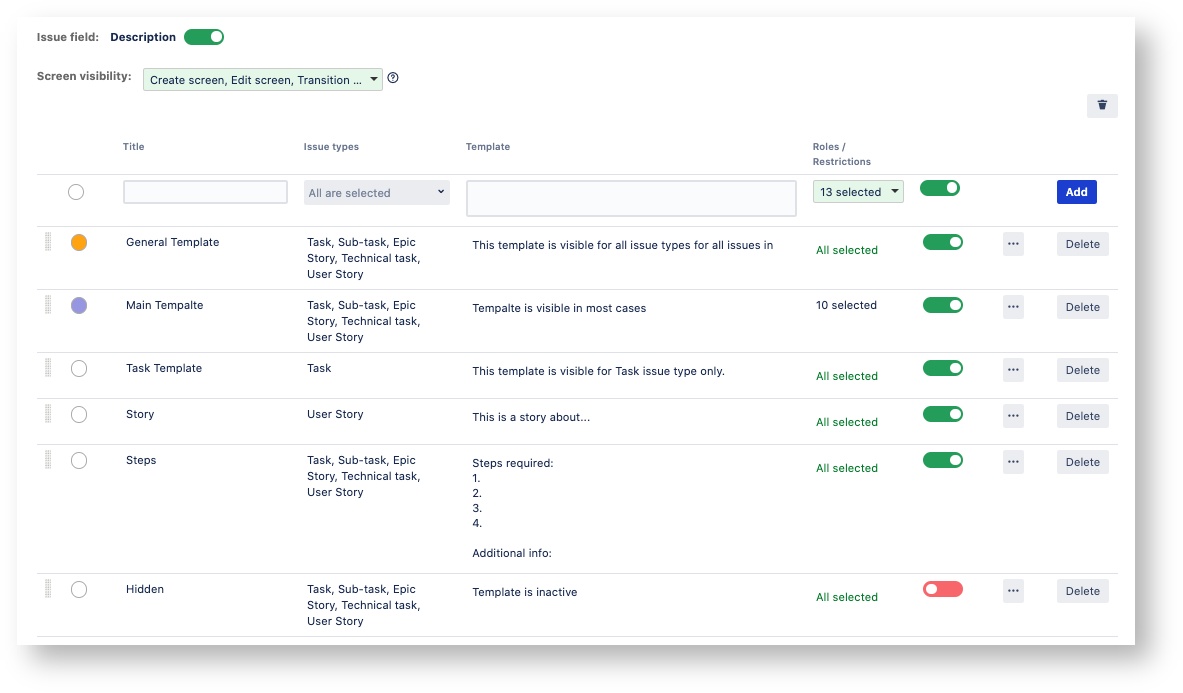
- Click Add. New field template requires information about its name (Title), issue type visibility (Issue Type), and the Template itself.
- Click Add to the right of the template.
Edit template
- In the created template, click on any editable area.
- To save changes, click Update (to discard changes, click Cancel).
Field variables
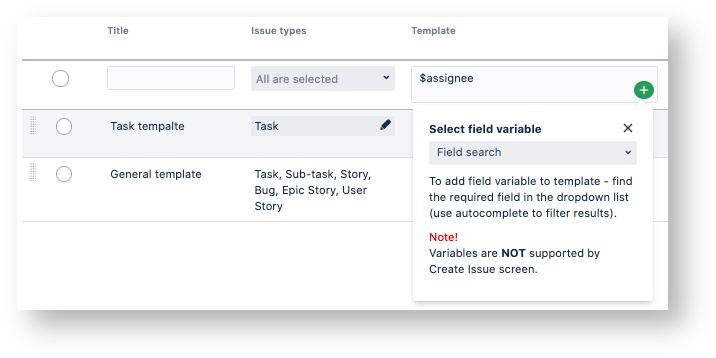
For more interactivity field variables are available to put into the body of the template. Field variable will be automatically transformed into the value of the field you selected upon using this template.
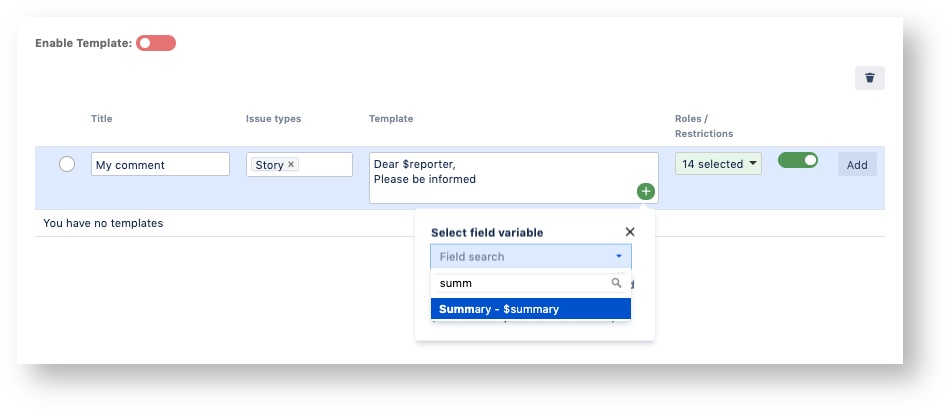
To see the list of available variables just click on the element in the bottom right corner of the comment template field. After clicking a hint will appear.
![]() Field variables (unlike variables for the comment section - see below) do now work with on the Issue Create screen. Please keep this information in mind when using it.
Field variables (unlike variables for the comment section - see below) do now work with on the Issue Create screen. Please keep this information in mind when using it.
Hide template
- To temporarily turn off template visibility, go to Edit mode.
- Change Enable toggle to inactive state (to make the template visible for users, turn the toggle back on).
Template is disabled in admin panel:
As a result Template is not visible on create issue screen:
Template is enabled in admin panel:
As a result Template is visible on create issue screen:
Visibility on screens
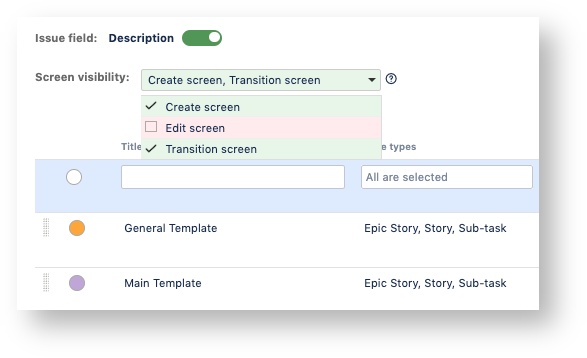
Project administrator can pick screens to display or hide templates. To show or hide templates on a particular screen:
- Click on dropdown list
- Select the required screen to show/hide templates on it
All templates for the current field will only show in the mentioned screens. By default templates are enabled on all screens.
Issue view
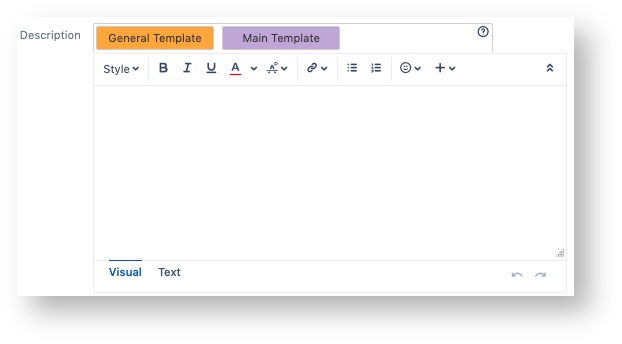
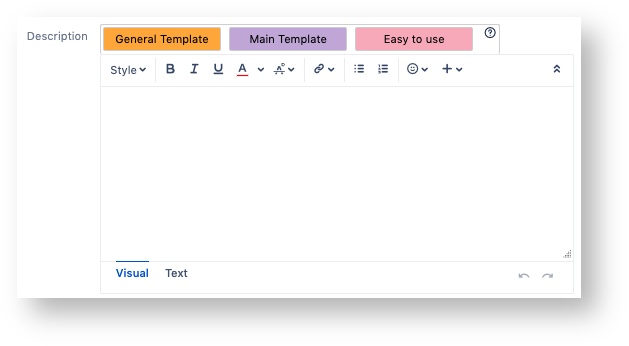
Only 3 templates can be displayed at a time. If there are more than 3 templates, they will be hidden under "more" drop down section. In case you need to change the template position, use its ordering function.
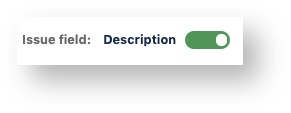
To hide the whole template panel with all its templates for a certain field, find a toggle bar below the field name in Field Templates menu. To deactivate the template menu over the field on Issue screens, turn the toggle off.
Role restriction
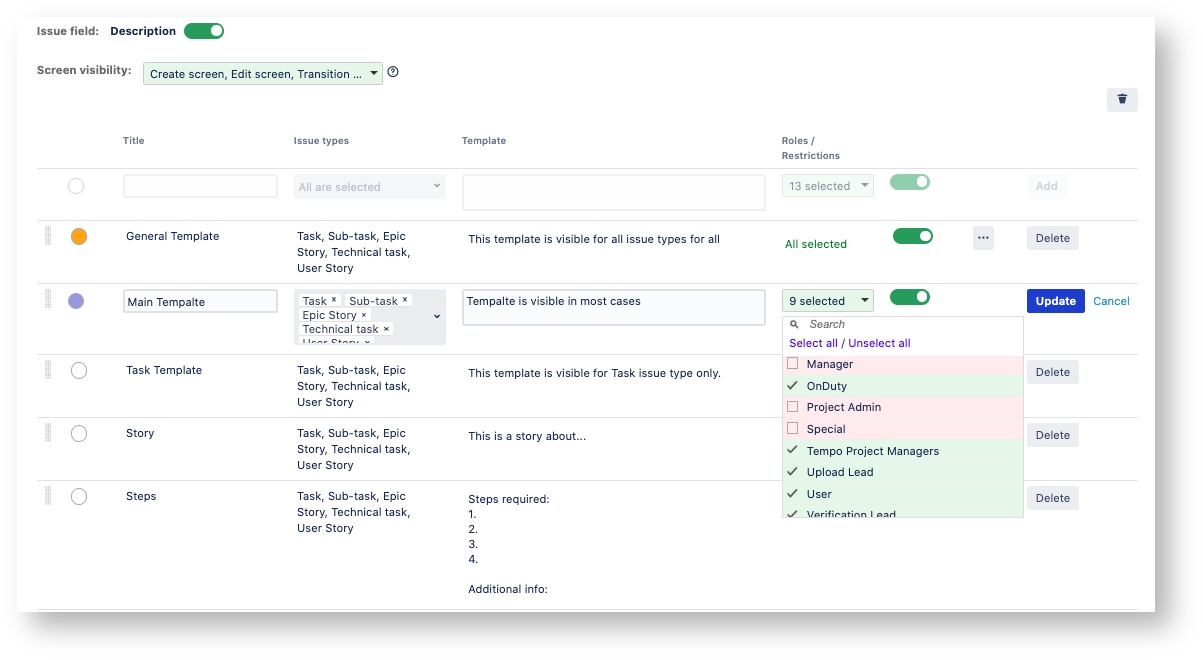
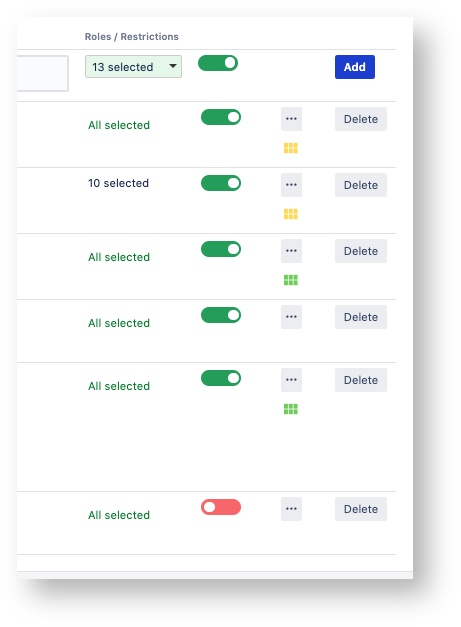
You can also hide or show templates to other users depending on their role in the project. For example you only want some comment template to be visible for Manager role. In this case click on the drop down field Roles/Restrictions and mark the roles that you want to see current template.
To change the number of roles allowed to see this template in issues mark or unmark the ones you need (by default all roles can see the template). There are several states of this field:
- All selected (All roles in the project can see current template)
- None selected (No one can see current template)
- "N" selected (Exact number of roles that can see current template)
Keep in mind that if user is not assigned to any role in project he/she won't be able to see any template.
Template groups
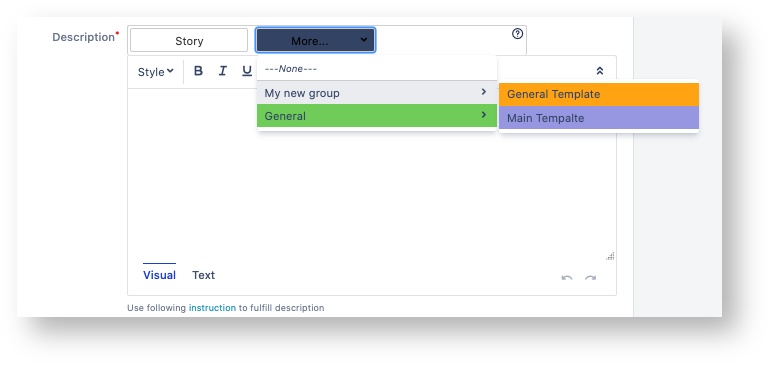
All created templates can be visually combined into groups. These groups are to be created by administrators to be later assigned to templates in necessary. This mechanism helps to save space as well as helps users to navigate between given options.
These groups can be created by administrators and then assigned to templated depending on their topic.
Create groups
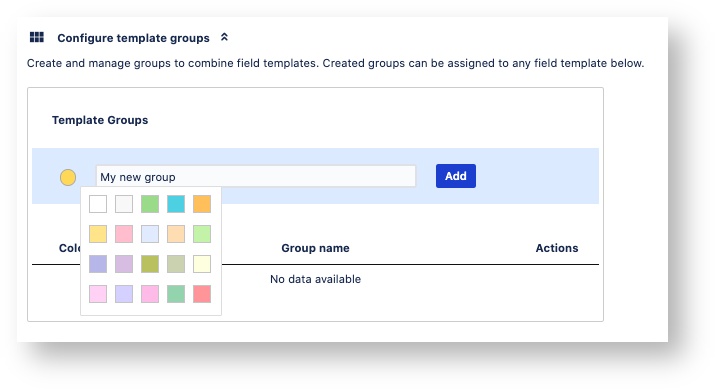
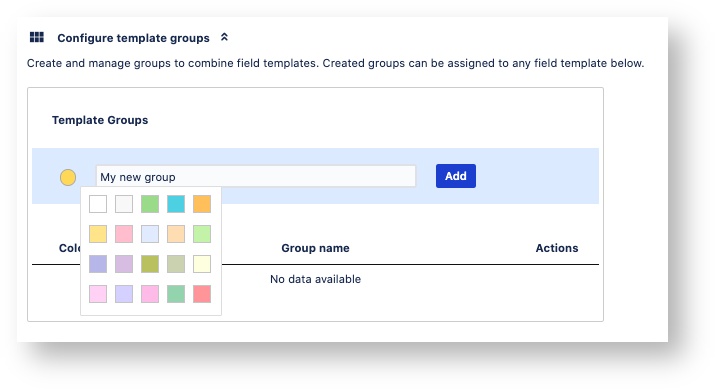
Find drop down menu Configure template groups.
Define the name of your future group in the corresponding field.
Optionally you can set color for this group to visually emphasize it.
Add template to group
All previously created groups can now be assigned to any template of your choice.
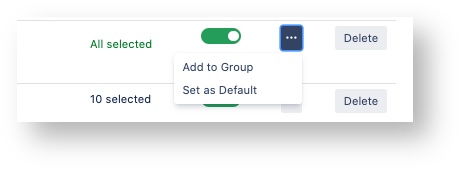
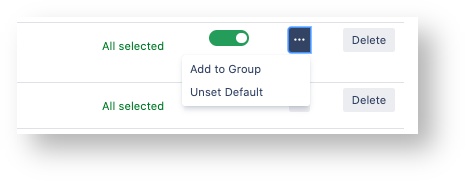
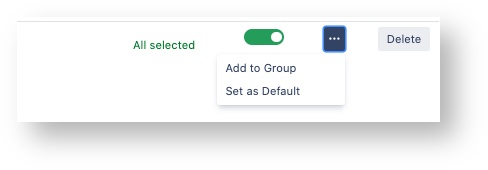
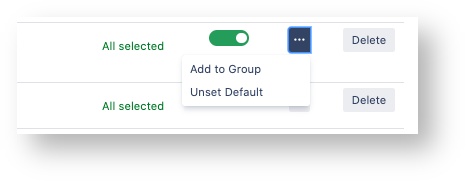
To do so, find the required template and press menu item (tree dots).
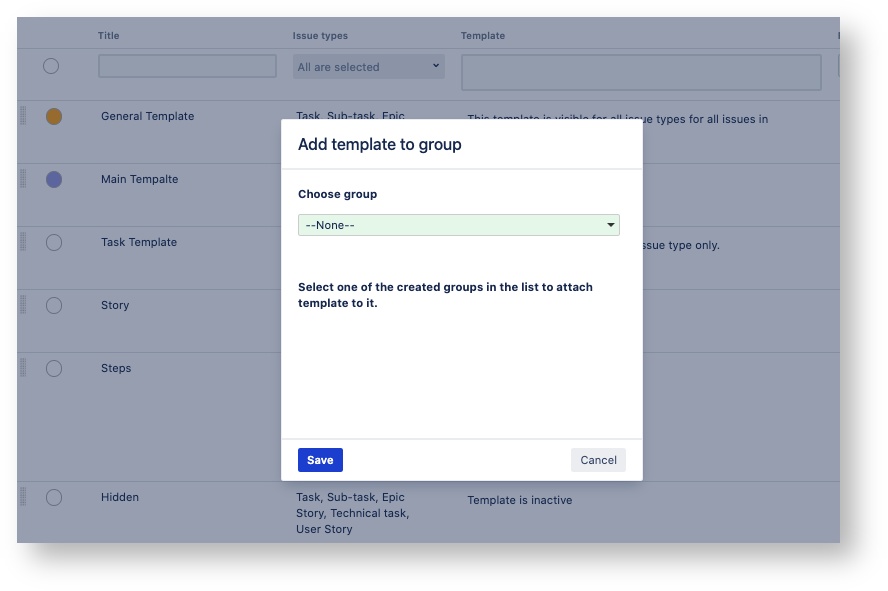
In the opened list select Add to Group option.
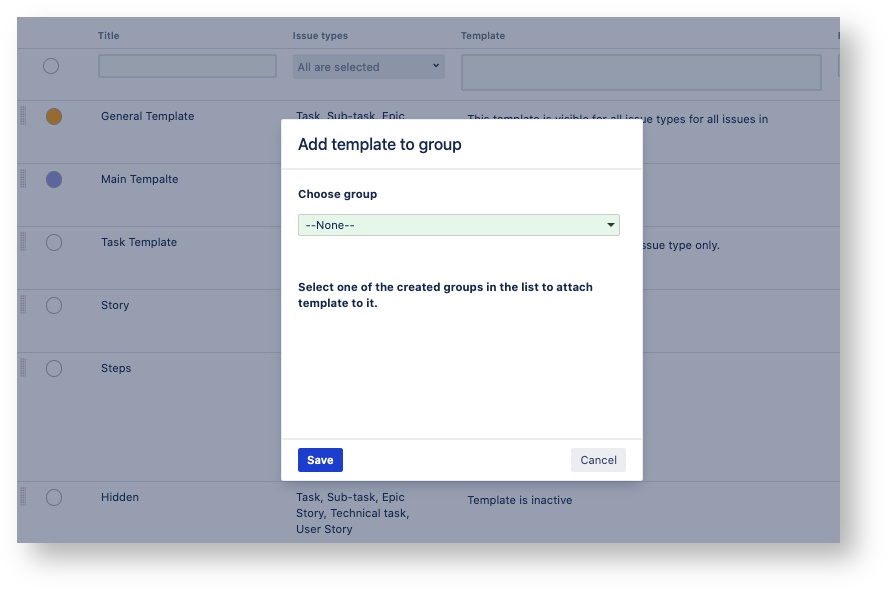
In the given screen pick one of the previously created groups to assign group to this template and confirm you choice.
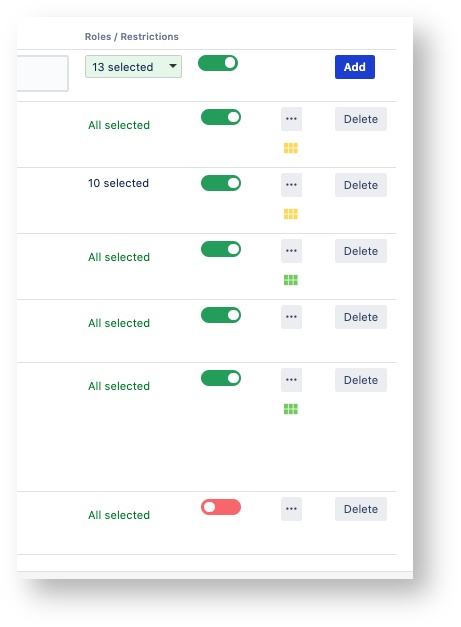
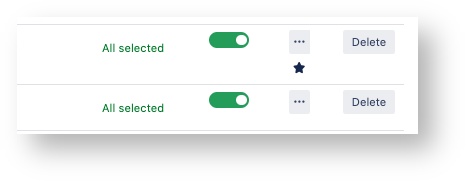
Since template is in a group a small indicator icon will appear on the template menu under the 3 dots menu. This means this template is already assigned to a group. This icon will also change its color depending on the color of the group.
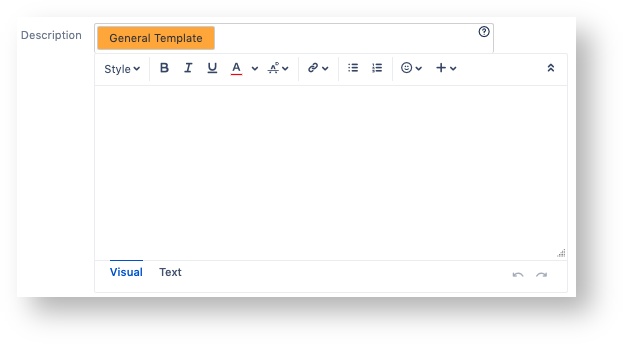
Now this template will be visible above the field in a separate container.
Feature available for comment templates too.
Default value (Template)
Templates optionally can be set as field default values. If set up, user will automatically see field populated with the required value.
To make Template Default find template menu (three dots) and select Set as default in the drop down menu.
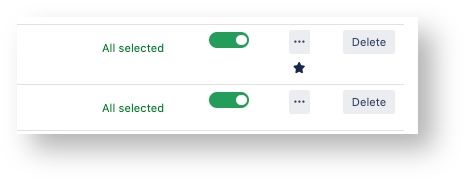
Templates marked as default will have a star icon next to it.
You can always set another template as default and remove Default state by selecting Unset Default in the template menu.
You can set as many defaults for the same field as you want. For example you can use this feature to set default field values for each issue type.
If several templates for the same field are set as default for one issue type, only the first template in the order list will be displayed.
Change template order
Project administrator can change the template order by using the drag-and-drop action in Field Templates menu. Ordering will affect the sequence of template buttons on Create Issue screen.
Template ordering plays a big role in group ordering. Template groups order depends on the order of templates in it.
Delete template
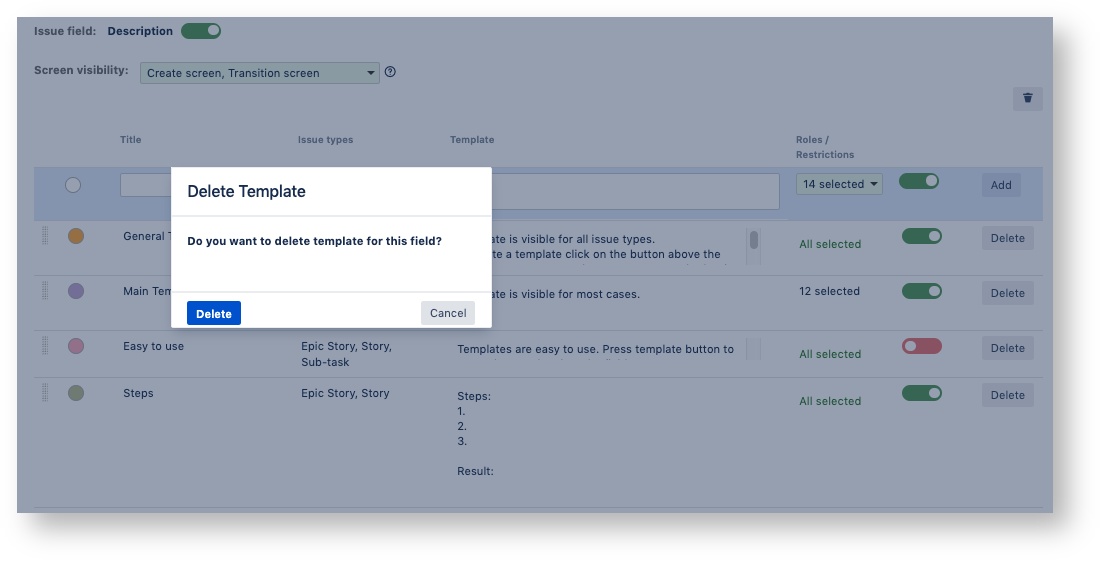
- To delete each template for any field, click Delete next to the required template.
- To confirm template deletion, click Delete (to discard, click Cancel).
Delete all templates for a field
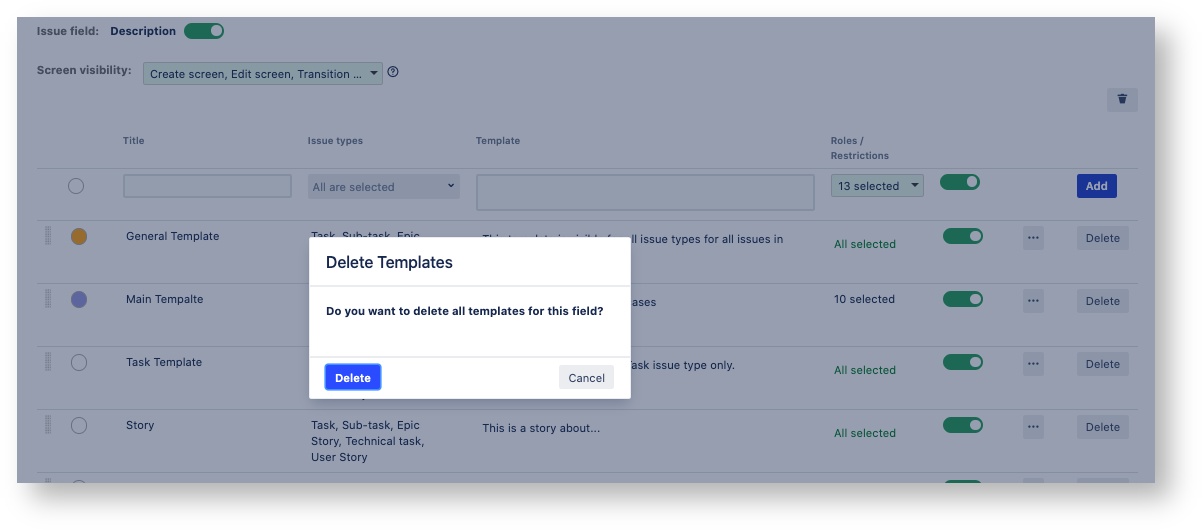
- Click to the right of the field name. Confirmation window appears.
- To delete all templates for the current field, click Delete (to discard, click Cancel).
Comment Templates
Template variables
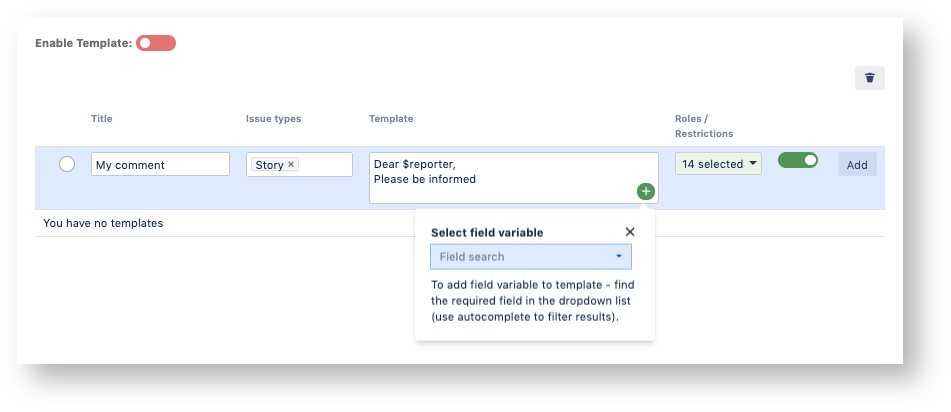
Comment templates provide ability to put variables into template body. This variable will take value from issue upon pasting comment template into the comment field.
To see the list of available variables just click on the element in the bottom right corner of the comment template field. After clicking a hint will appear.
To search for the required field variable, start typing it name in the search area. Clicking on the given option will automatically paste the variable into he template body. Variables are available only for comment templates and personal templates.
Personal Templates
Each user in Jira has a menu with own templates.
To access it click on the Personal Templates option in the profile menu.
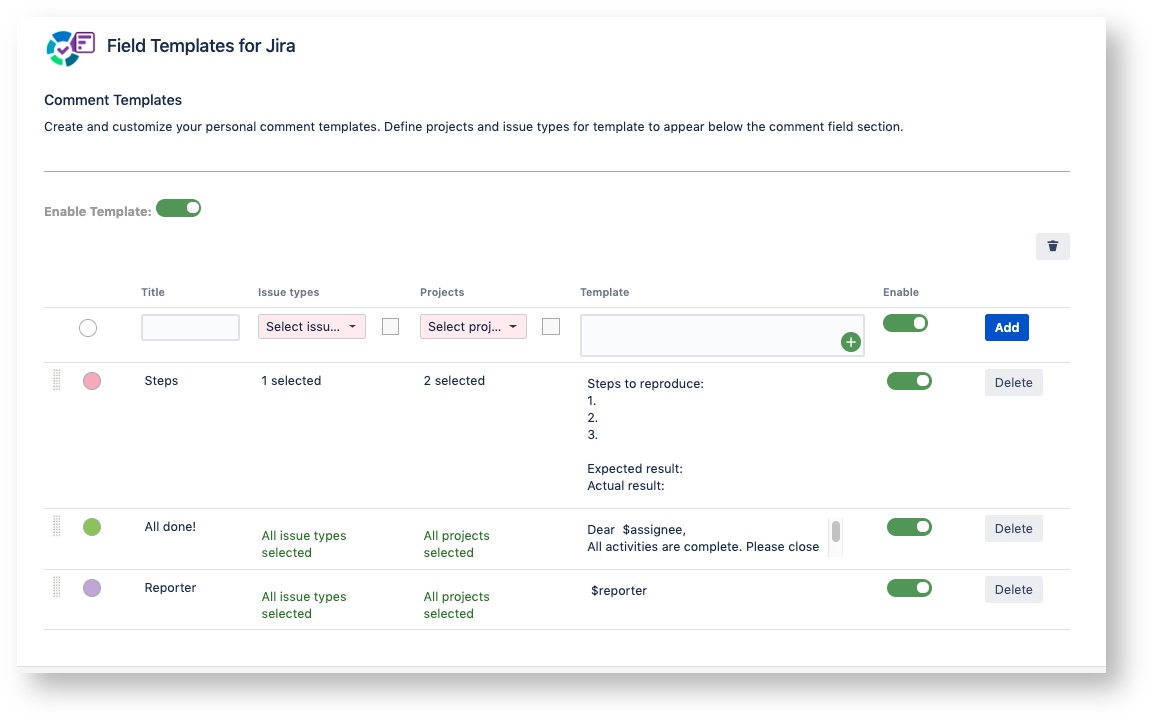
Personal templates are templates for comments that are visible only for its owner. These personal comment templates can be set up for different projects and issue types.
Most of the templates functionality it similar to adding other field or comment templates, but with an exception that you set up visibility of templates not only for issue types but for projects as well.
Set up template visibility by selecting options in fields:
- Issue Types - set the list of issue types to display the template
- Projects - select projects that your template will be available in. Note, rule with Issue types is also applied.
Use checkbox next to each field to activate all options at once.
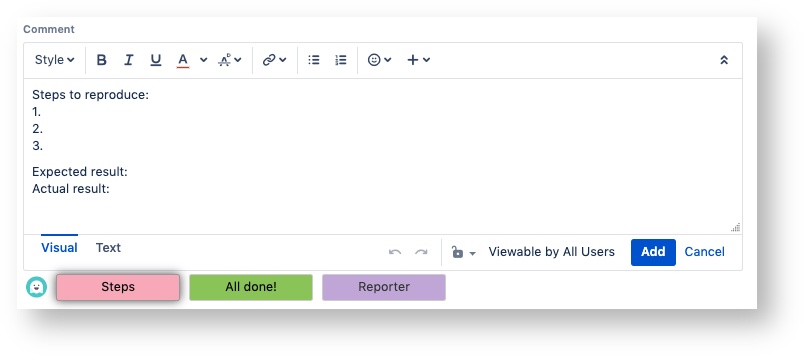
Personal templates will be displayed under the comment field area in issues matching the set criteria of issue types and project visibility.
Click on template name to paste it as comment.
Jira administrator can set up personal templates for other users. See instruction.
Template groups
All created templates can be visually combined into groups. These groups are to be created by administrators to be later assigned to templates in necessary. This mechanism helps to save space as well as helps users to navigate between given options.
These groups can be created by administrators and then assigned to templated depending on their topic.
Create groups
1. Find drop down menu Configure template groups.
2. Define the name of your future group in the corresponding field.
Optionally you can set color for this group to visually emphasize it.
Add template to group
All previously created groups can now be assigned to any template of your choice.
To do so, find the required template and press menu item (tree dots).
In the opened list select Add to Group option.
In the given screen pick one of the previously created groups to assign group to this template and confirm you choice.
Since template is in a group a small indicator icon will appear on the template menu. This means this template is already assigned to a group. This icon will also change its color depending on the color of the group.
Now this template will be visible above the field in a separate container.
Feature available for comment templates too.
Default value (Template)
Templates optionally can be set as field default values. If set up, user will automatically see field populated with the required value.
To make Template Default find template menu (three dots) and select Set as default in the drop down menu.
Templates marked as default will have a star icon next to it.
You can always set another template as default and remove Default state by selecting Unset Default in the template menu.
Statistics
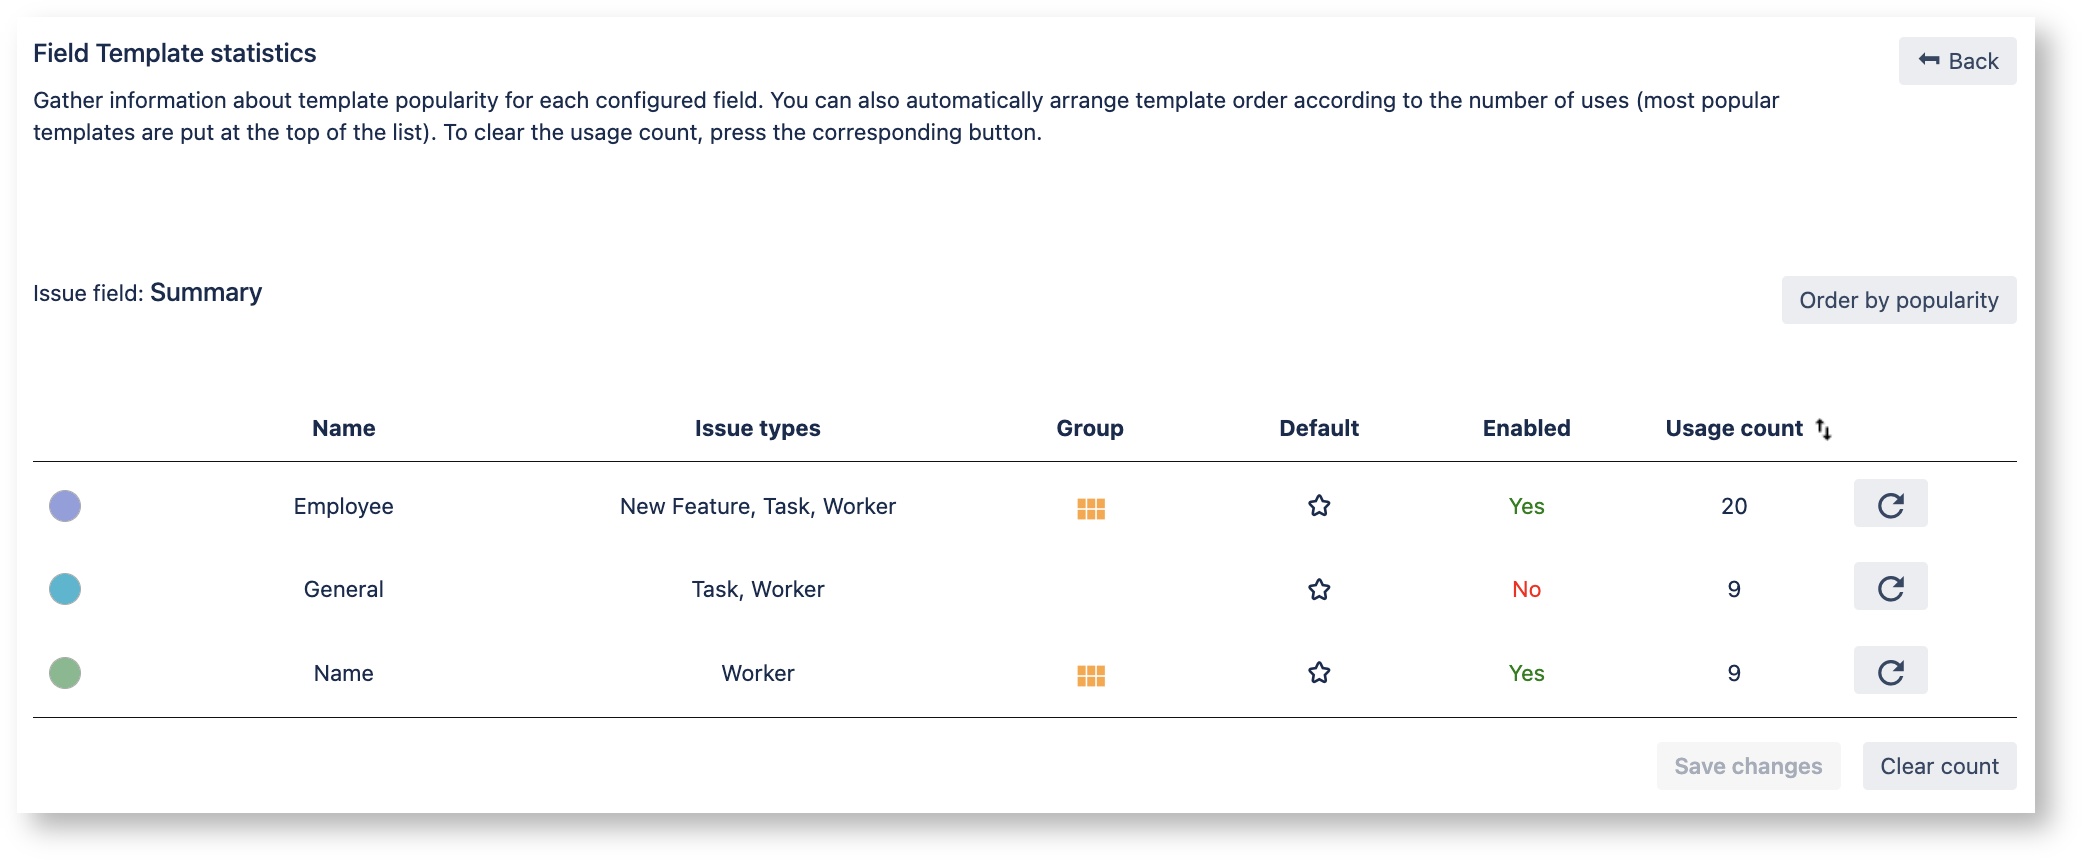
Project administrator can get statistics on every field template usage in current project. To access this page find the "Statistics" button.
The opened page will show every existing field template in this project.
Apart from the general information about every template it also shows the count of how much this template was used. This is displayed under the "Usage count".
You can clear the usage count for each template by clicking the button next to any of the templates. If you want to do the same action for all the templates for a particular field click the "Clear count" button.
In case you want to order templates so that the most used templates appear first, press the "Order by popularity" button and then press "Save changes" to rearrange templates order.
